Calaos V3 is coming!

Hey everyone! It’s been a long time since the last update. We are not writing that much, but that doesn’t mean we are sleeping! In fact a huge amount of work has been done since the last release of v2. Let’s present you some new stuff and what work we have done so far.

Calaos Server

A lot of work has been done on calaos_server. First many rewrite of some not so good component were done. This was mainly to improve stability and robustness of the server. For example before, a lot of blocking work was done directly inside calaos_server. Now all action that takes time to perform, runs on a separate process. A good example is communication with hardware (like Wago, or 1Wire), that was done in the main process, and thus blocking before calaos_server can continue executing more rules. This was also a problem when some hardware were not responding, calaos_server could have been very slow to respond to events (like pressing on a switch).

Using that same infrastructure allows us to also make all LUA scripts run outside of calaos_server. And now, starting from v3, scripts can run for long time and they would not slow down calaos_server anymore.

New hardware support

Of course, all of this comes also with new hardware support! Calaos now supports all those new hardware devices:

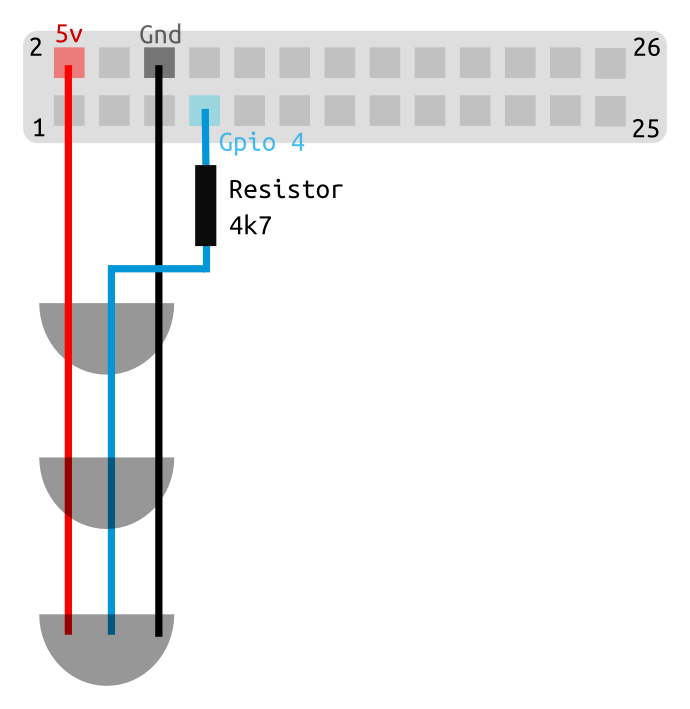
  • MySensors nodes, DIY wireless platform (http://mysensors.org)
  • Open Lighting Architecture, DMX server that supports USB DMX or LAN interfaces (https://www.openlighting.org/ola/)
  • Generic LAN devices (Ping and WakeOnLan objects)
  • Direct KNX support (using eibnetmux)
  • Milight/Limitless low cost led bulbs
  • USB Blinkstick devices
  • Philips Hue bulbs

API

The calaos_server API for communicating with all clients has been improved a lot. Before today, there was a simple HTTP+JSON API plus a not-so-good TCP API. Today the TCP API is dropped and a new Websocket API comes in.

Websocket allows us to keep long time connection through HTTP. The most useful enhancement we directly have is no more polling for checking IO states. Calaos mobile and web-app benefits right away from this feature, and they are way faster than before.

Calaos home

Calaos has been updated to use latest EFL and Websocket.

Calaos web-app

The web app was actually in a bad shape and because the code base was a mess, we decided to rewrite entirely (well not entirely actually) and use the brand new websocket API. Now the webapp is small, fast and optimized.
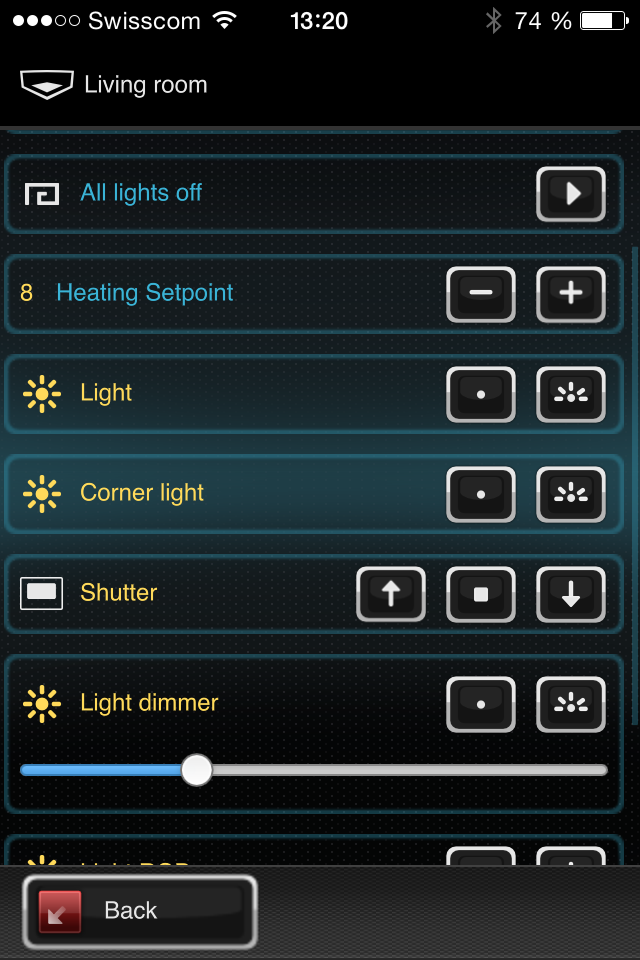
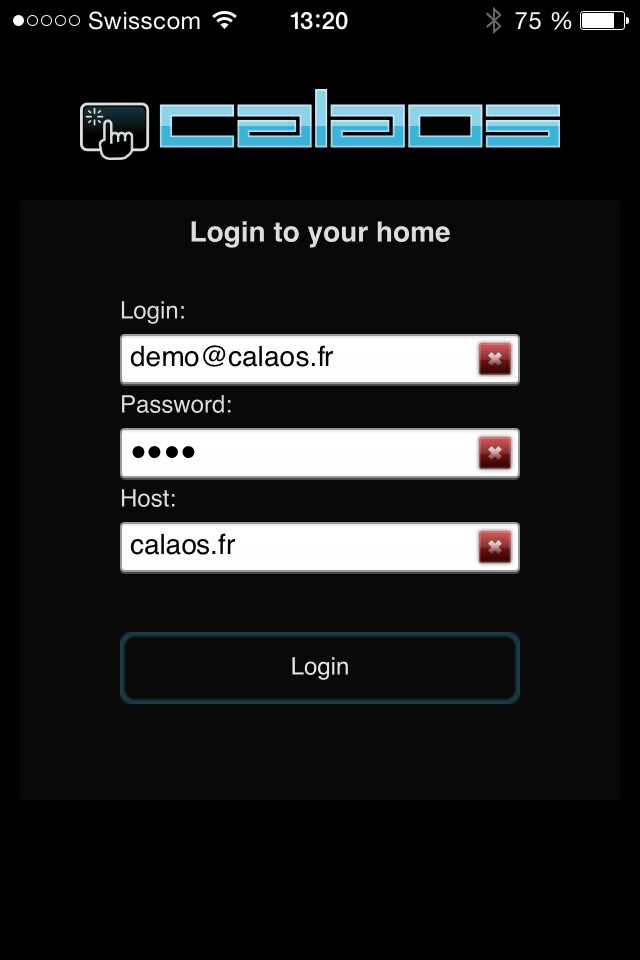
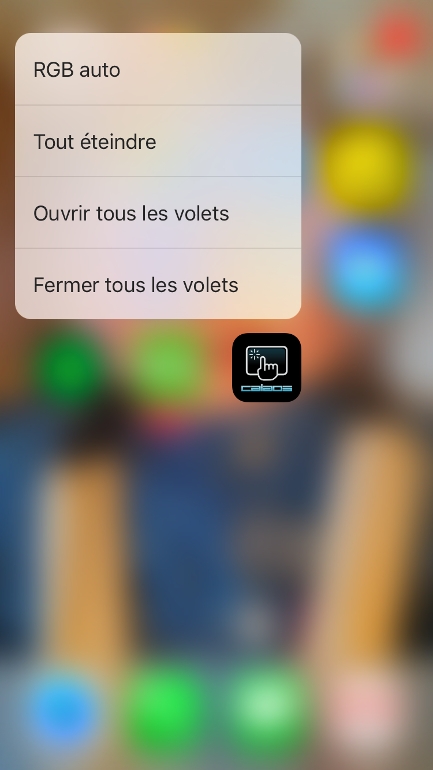
Calaos mobile

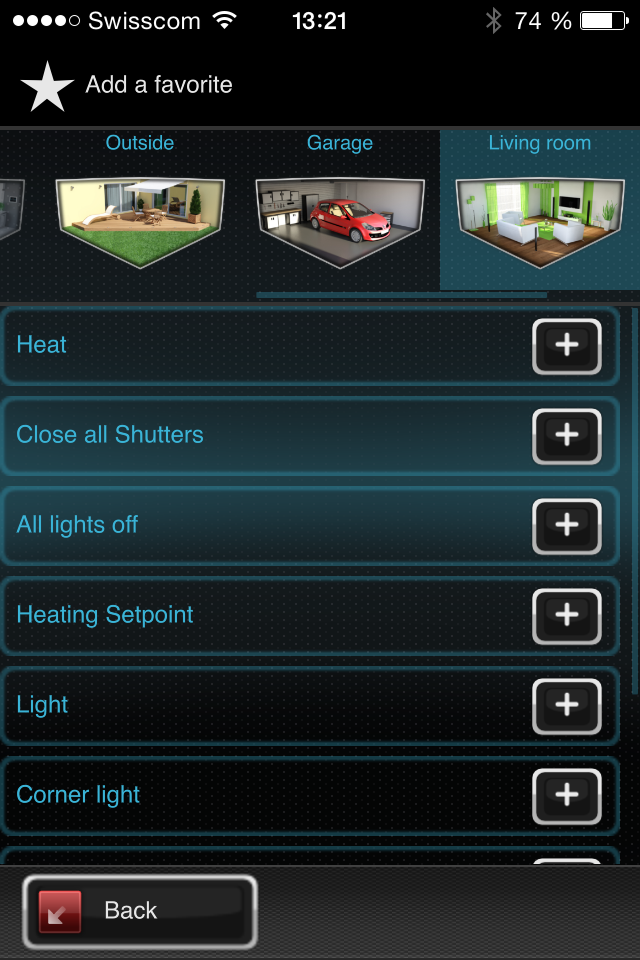
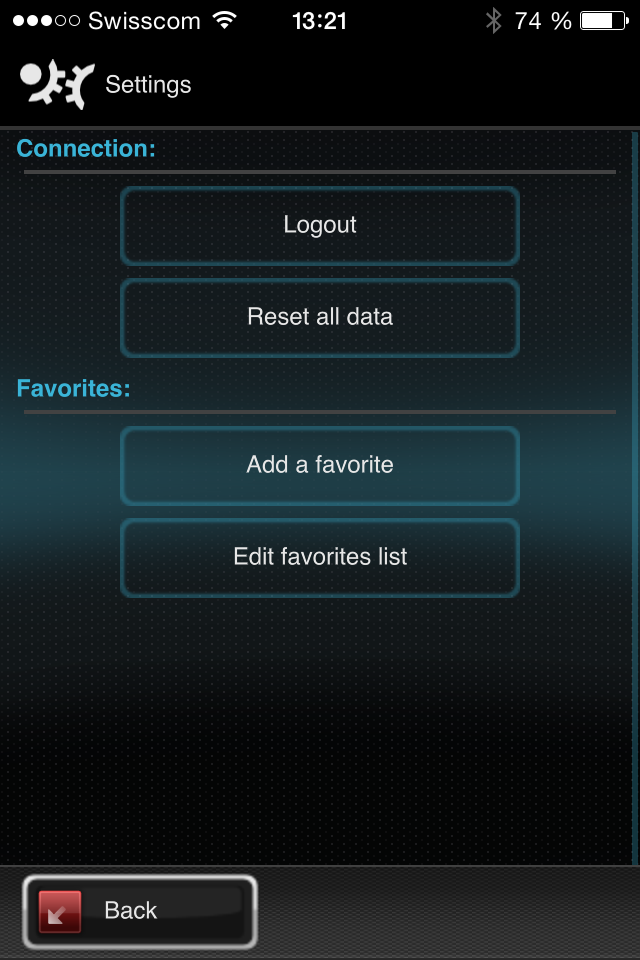
Calaos mobile has been improved. It supports now the new websocket API (that saves bandwidth on mobile network), but keeps compatibility with the old v2 calaos_server and its HTTP only API. This will allow us to update the app on the stores soon. All reported bugs are also fixed, and neat features have been added such as Automatic Login when you start the app, or 3D touch Quick Actions on iOS9/iPhone6S (Quick Actions lists the most used scenarios you have for quick start).

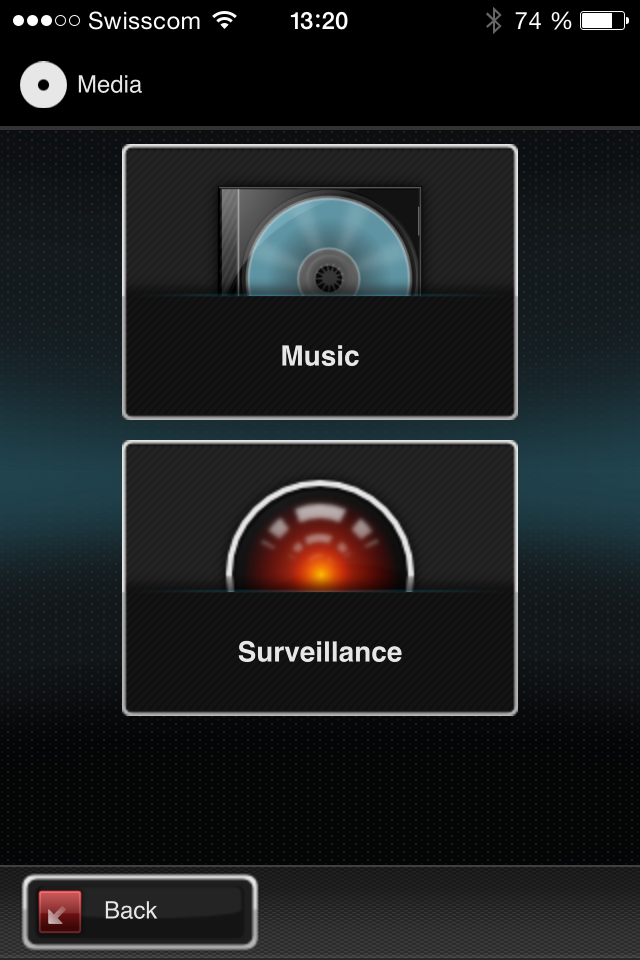
Also cameras is finally working. But unfortunately it will only work with the next v3, as there is a nasty bug in v2 that prevents calaos_mobile to get camera pictures…

calaos mobile Quick Actions

Calaos OS

On calaos-os we have updated a lot of packages for improving security. But most importantly, we made calaos-os working with websocket and SSL connections. This was done by dropping lighttpd and using haproxy instead because right now calaos_server is a real HTTP server and serves all web pages for calaos-webapp. Some required tools are also installed (but disabled by default) like OLA (Open Lightning Architecture) or KNX (eibnetmux daemon).

We also improved running the image in virtual machine like Virtualbox.

Another great tools we are going to write for the next release is a backup/restore script. This will let you easily migrate from V2 to V3 just by doing a backup before the update, and restoring the backup after installation. The tool will take care of putting all your configuration files where they need to be. Updates are going to be fast! 🙂

Calaos installer

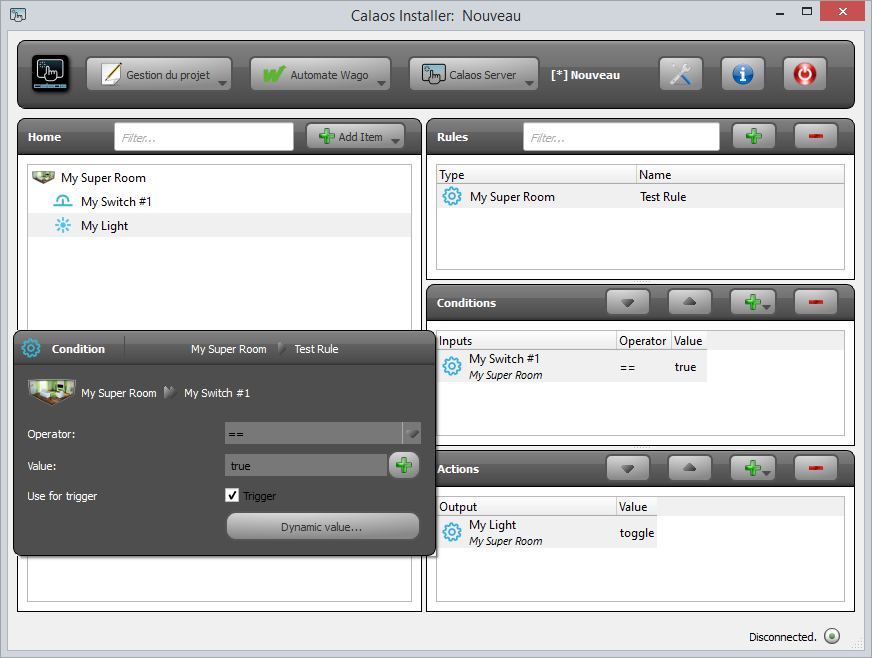
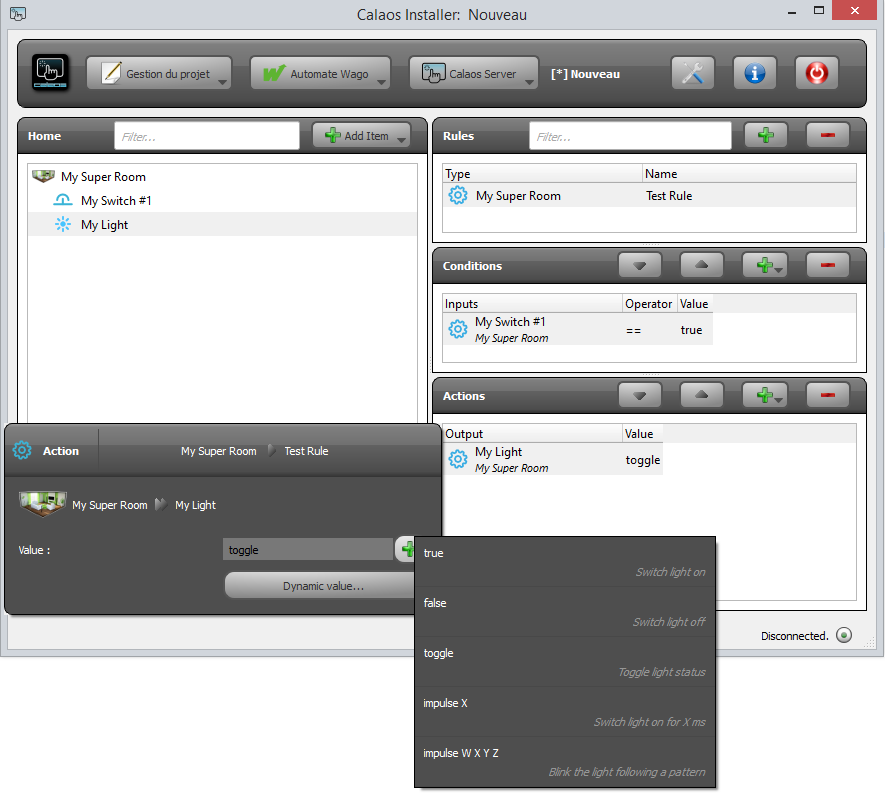
We implemented something really great in Calaos installer, automatic documentation for IO. That means that the doc is automatically generated and displayed to the user for all IO properties. To explain better here is a screenshot when going under properties dialog of an IO:

IODoc

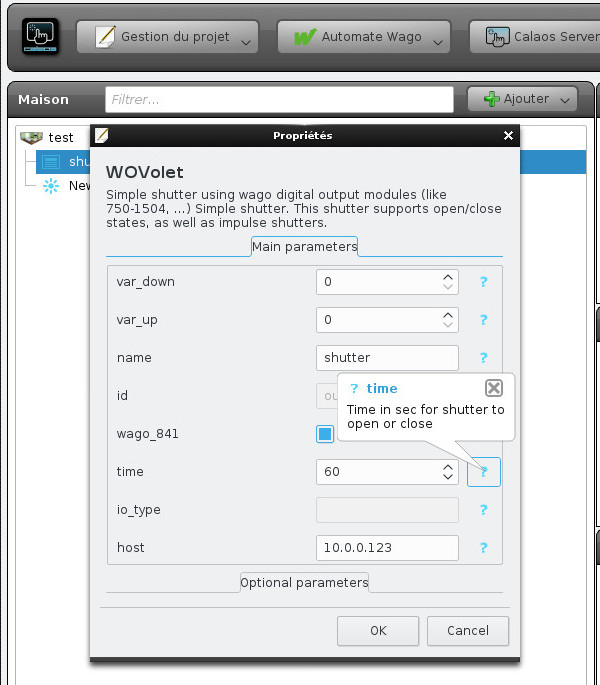
All properties that were obscure before, are now correctly explained and you know what value can be set or not. This is going to help a lot of users understand how to configure correctly all options.

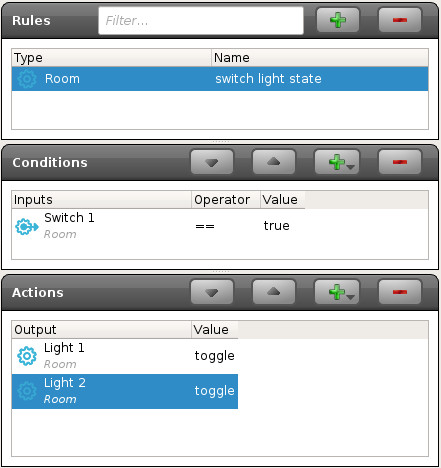
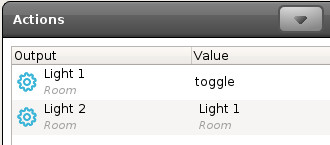
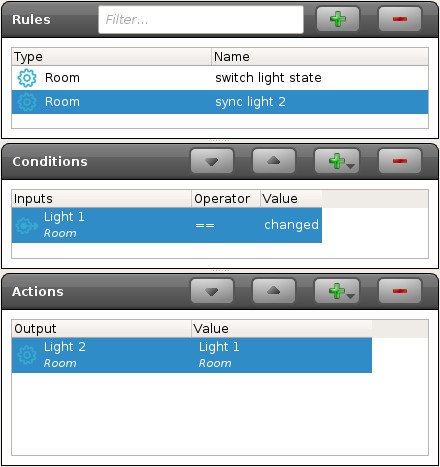
The script section also gained new features, and of course the support of all new hardware has been added.

When will the V3 be out?

In the next weeks we are going to to some alpha builds, so you guys can test out all the new functions. So stay tuned for the next update!

Release of Calaos v2.0

Hi there,

After many months of development, Calaos v2.0 (https://calaos.fr) is finally out. This is the first stable version released made available thanks to the work of the community. Besides the change of license to GPLv3, work has been done on cleaning the code, modularity of all layers, better handling of the hardware, using gettext for english and translation, and many bug fixes.

Continue reading

Calaos Rules System #2

Lets continue this series on the Rule system. Today we are going to create some more advanced rules, and explain how it works under the hood.

Control multiple IO in sync

In this example we have two light in a room. And we want that when we press the switch both light goes ON simultaneously.

A basic approach of doing the rule would be:

That will work when both lights are synced, but the problem that need to be solved is that when lights are controlled directly (from calaos_home or calaos_mobile), and then pressing the switch, they could be out of sync. (first is ON and the second is OFF). The only way to put both lights in sync again is to do it manually. No so smart!

As you saw in the action popup, you can choose an action for the light from a predefined static list. Possible actions are for ex: toggle, true, false, … But there is a button right under the action, Dynamic value. This is where you can choose a value from an other IO. In concrete terms, after clicking the button you will be able to choose an IO, and when the action is executed, the value will be extracted from the selected IO.

ci_02


Lets do that for the Light 2. So now in our example the first action is to toggle the state of the first light, and then assign that new state to the second light.
Now with such a rule, if the lights are not in sync, the second light will automatically be set at the same state. Of course this example can be repeated with other type of IO, like shutters. It’s extremely powerful when controlling multiple shutters with just one button.

Other approach

There is another way to sync both lights, by using a second rule. This time we will use a rule to toggle the state of the first light:

ci_04

And a second rule with a condition that checks for the Light 1 state change. If the state changes, we update the state of the second light from the first light.

ci_05

The fundamental difference between the two solutions exposed here is that the sync is done everytime the state of Light 1 changes, even when you control the light from the user interfaces. In the first solution that’s not the case, the second light is only synced when you press the switch.

The second approach is good when you need to link multiple outputs. You only need to do an action on the first IO, and the second will be updated automatically.


Calaos OS

What is Calaos OS? That question is asked quite often.

Calaos is not a single software and if you want to get a full Calaos stack running and configured you need to setup all the following softwares :

  • calaos_server
  • calaos_home
  • calaos_web
  • A web server (for serving calaos_web)
  • Configure SSL and certificated on your web browser. It’s needed if you wand to connect to calaos_server remotely, it’s the case for calaos_installer and for the mobile application. SSL is there to guarantee that the connection between your mobile and calaos box is encrypted. Otherwise all the informations you send are readable.
  • Compile calaos dependencies (EfL and Elementary)

Some people have skills to get all this stuff running on regular Linux distributions, but for the majority of people, that’s not the case, and they should use Calaos OS, as it embed all the required software in a single image. It’s also covering a lot of hardware configuration and their specificities. The Idea of using Calaos OS is to keep all the hard and complex work of integration inside Calaos OS, and give to the users a real good experience.

Calaos OS repository : http://github.com/calaos/calaos_os

Calaos OS is based on the Yocto/OpenEmbedded. This is an amazing build system, which allows us to create a specific GNU/Linux distribution four our specific needs.

In our case, the Yocto version we are using is Yocto 1.5 (Dora). We are using systemd as for the init process, XOrg for the graphics stack. and Connman for the nework manager. Calaos server and Calaos home are started at boot. For calaos-web we are using Lighttpd to serve pages. We are also using EFL 1.7

If your electronic board, or your PC is not currently supported by Calaos OS. It’s most of the time just that we never tried it. So it’s maybe not a big thing to add your new architecture in Calaos OS. If the architecture is supported by Yocto, there is a lot of chances that adding it to Calaos OS is easy. Take a look at http://layers.openembedded.org to see if a yocto BSP exists for your hardware.

Even that it’s simple to add a new architecture, it takes a lot of time and space on your harddrive to build a full image of Calaos OS. So please be patient and keep in mind that you need a real big machine to build an image. Currently i’m using a Core i7 machine with 8GB of ram, and it take arround 2hours to build a complete image for Raspberrypi.

Building your own image is easy to do, just follow the steps in the Calaos OS Readme :

https://github.com/calaos/calaos-os/blob/master/README.md

If you get into troubles, don’t hesitate, to ask questions on the forum : https://calaos.fr/forum or on IRC (#calaos on irc.freenode.org) We will guide you.


Calaos and 1-Wire

1-Wire is a communication bus, wich uses only 1 wire^W 2 or 3 wires for communications between slaves and a master. One of the most common 1wire module is a temperature sensor, the DS18b20. This is already calibrated, directly on the production line, and like all 1wire chips it contains a unique identifier.

The DS18B20 has an operating temperature range of -55°C to +125°C. And the sensor is accurate to +/-0.5°C over the range of -10°C to +85°C. And it’s cheap, you can find it for less than 1€. You can even found a waterproof version of this sensor.

As it uses only 2 or 3 wires, it’s easy to add this kind of sensor in a house or an appartment, you only need a pair of twisted wires, like the one we found in ethernet or telephony cables.

On the home automation box, you need an hardware interface to communicate with the sensor, and a program to talk with this interace. Calaos and more specifically calaos-os integrate such sofware : owfs

For the hardwre interface, you have 3 choices. If your home automation box, is a Raspberrypi or an electornic card with GPIOs, you may use the w1 linux kernel driver. It emulates a 1wire master with a single gpio. The only thing you have to do is to connect 1-wire sensors to the Rpi GPIO like here :

1wire

As you can see, 1wire is a bus so we can chain temperature sensors.

Now on the sofware side, once you have calaos-os installed on your Raspberrypi, you need to load the w1 module. It’s responsible to handle the communication with the sensors.

modprobe w1-gpio

modprobe w1_therm

I guess you want this changes to be persistent over reboot of the rpi, so to do that create a new file named w1.conf in the /etc/modules-load.d/  directory. And add those two lines :

w1-gpio

w1_therm

Now we have to configure Calaos to add the 1wire temperature sensor.

On your computer, launch calaos_installer. Auto detect calaos server by clicking on the Auto Detect button. The IP of calaos_server should appear in the list. So you can connect to calaos_server and download your configuration.

Now add the 1wire temperature sensor, click Add Item -> 1wire -> temperature sensor

ci_onewire

Name is the name that the sensor will take in all Calaos User Interfaces.

Sensor ID, is the 1wire ID. It’s unique for each sensor, and can be read on the sensor itself, it’s something like 28.A691B4040000. (It’s really small on the sensor, but i swear it’s written)

Finally the OWFS argument, is the argument taht will be passed to owfs to initialize itself. For w1 kernel driver, it’s –w1

Save the config, upload it again on you home automation box. And the new temperature should be displayed on Calaos Home, Calaos Mobile or Calaos Web.

If you don’t have, or don’t want to use GPIOs, and solder the sensors by yourself, you can choose an easier solution, and connect an USB module : the DS9490R module and connect 1wire sensors with RJ11 cable. On Calaos side, it’s exactly the same configuration. The only point is to change the OWFS argument, and use the “-u” argument instead of “–w1”.

Maxim_Integrated-DS9490R-image

There is also an other solution, with an ethernet device on which you can connect your sensor, and then the communication between your Home Automation box and the module goes through ethernet. This solution should also work on Calaos (well somebody said it worked), and you might change the OWFS arguments and add the ip and port of the Enet server like this : “–enet=192.168.2.43 -p 4304”

ow-server-enet

Calaos Rules System #1

A question that comes very often in Calaos is “How does the rules system works in Calaos? How to do [name what you want here]?”. I’m going to start a series of posts to explain that with some real examples on how it actually works and how to do advanced tricks with Calaos. So, lets start with the basics.

Architecture

At the root of the entire system sits calaos_server. This is the main component of the system and its purpose is to talk to the underlying hardware (Wago PLC, 1-wire, Zibase, MySensors, …), execute some user defined rules, and export some API for the different user interfaces (calaos_home, calaos_mobile, webapp, …).

calaos_server acts as a daemon process and do what the user has configured in calaos_installer. Two types of configuration needs to be done, first declaring Items and devices in rooms (left part of calaos_installer), and finally creating rules using those items (right side of calaos_installer).

Calaos Installer

IO and rules

In calaos, all items declared are directly accessible from any user interface. For example, if you create a light, you can control that particular light on any interface. But when you create a switch, it will not do anything unless you create a rule that tells calaos what to do with your switch and eventually do an action like switch on or off your light. This is where rule comes in. A rule is basically an action that is triggered by an event. In our switch/light example, the event of pressing the switch will tell calaos to execute an action on the light.

Any rules are composed of a trigger event list and a actions. An event can also have some condition, but we will see that in a later post 😉

Basic example

Let’s start with a basic example of a switch that can switch on/off a light. First create our two devices, a switch and a light.

installer02

Next we are going to create a rule by clicking on the + button in the top right. Enter a rule name and type (for categorization) and click Ok. A new empty rule is created. You will see an empty condition list, and an empty action list. Let’s add the condition by dragging the switch in the condition list.

installer03

When adding a condition and clicking on it, you will see a popup appear. Here you can configure the condition. For now we can use the default values that means the event of: When the switch is pressed (true means the switch is active).

The first part of the rule is done, we need now to add an action to be executed after the switch is pressed. Lets drag the light to the action list.

installer04

The same kind of popup appears after adding the light to the list, it will let you configure what action to do for that particular light. Every items supports different kind of actions. The default action for a light is toggle which means invert the light state on every rule execution.

Now we have seen how to create a basic rule to handle a switch press that will toggle a light. Of course the same thing can be done for all the items and devices in calaos. All hardware devices (shutter, temperature, …) can have different actions or events, and calaos_installer tries to list them all in the action list.

In the next post we will see how to create more complicated rules. Calaos can also have some virtual items (timers, time ranges, variables, …), and they behave exactly the same regarding the event/action system.

Calaos Mobile

I’ve been working lately on a new mobile application. Now you are going to say: “what, again?”, and you’re right 🙂

But some history first. At the beginning we only had one (not so good) mobile app that was for iOS. And it was only allowing you to use a native iOS interface from your local network, and when outside, it loaded an ugly web UI from calaos_web. No Android. Then a few years ago I started working on a complete rewrite of the iOS app. Entirely native. No more web. It was never released, because I had a lot of pain to make fully working every time Apple updated their SDK. And again, no Android.

Then, 3 months ago I wanted to try something new. Qt Quick for mobile Apps. Since I’am used to Qt development for quite some time now, it was a great opportunity to see if Qt is now ready for mobile development. Result: We have now a new Calaos Mobile app that runs on iOS and Android! The project is available as always on Github and to build it you will need the Qt SDK.

I also implemented a new cool feature for the mobile app: Favorites

Favorites is what you get on the main screen when the application starts, and it allows you to add your preferred items directly to the home page. This means less clicks to start your often used scenarios. For now only standard items can be added to the favorites view, but later I’m going to add some more special favorites items, stay tuned!

The mobile app will be available soon in the Apple Store and Google Play.

Here are some screenshots running on iOS:

Edit favorites Config Music Media Room My Home, rooms Favorites view Login